Sunday, November 21, 2010

Retopo in Blender 2.55


Hi!
Here is new post about Blender. As you know, there is no more retopo tool in new version of blender. Or it has some another way of how it function.
I'll explain it with simple example of creating sphere with triangle hole on it.
1. Create sphere and subdivide it once (switch to edit mode - tab, then A to select everything, and press Subdivide on the Mesh Tools panel )
2.Then switch to Object mode deselect Sphere and create Plane. Select to vertexes and press
Alt M 3 to make triangle from it. Yoll have something like image below


3.Subdivade triangle one time.
4.In the menu select Snap during transform, Face, Active, Project vertices on the surface of the other object. See image below.


5. Delete fill of your tringle. Rotate camera to have view you need. And now click on any of the drag instrument axis of objext


Yo'll have something like on image below


6.Now select sphere & triangle and press Ctrl+J to join them. Switch to edit mode and delete
vertexes inside of triangle.


Now is the tricky part. You have to join vertixes of triangle and sphere and create faces (select for or 3 vertexes and press F) . You can also merge some vertixes with Alt+M. With that you of course destroy topology , but if you'll have more vertexes in triangle and sphere at the beginning you'll have better result. For this tutorial it is not so important.


Smooth your sphere.


Sunday, April 18, 2010

Mistake

Oops. I have written in previouspost that to render image in Blender you need to push f10. In reality it is f12 (f10 is hot key for render in 3d Max)

Magic eye

That's post about how to make stereoimage a.k.a. Magic Eye, using Blender and special soft.
Ok. Main thing about it is to create map of deapth. Such programms like Bigle3d or stereogram maker could create stereoimage based on it. To create it you could simply render z-buffer. To make it in blender we will use Node editor (in Blender 2.5).
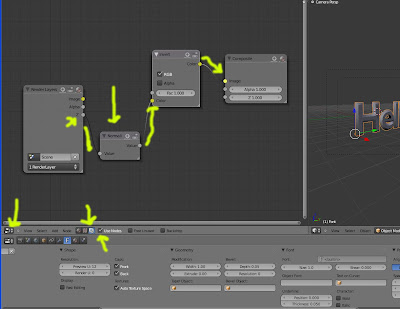
1)Open Node editor in window.
2)Click Compositing Nodes button.
3)Click Use Nodes
4)Add Vector --> Normalise and Color -->Invert .
5)Connect them like on image below


6) After that don't forget to push Compositing in PostProcessing tab in Render Menu.
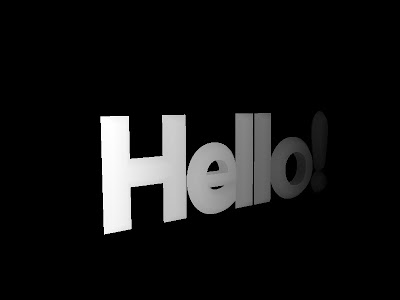
7) Ok. Now you could push F10 to render scene (of course you need to have some model).
If everything is right, you'll see something like this


Now you need to chose programm which could generate stereogram, draw texture ... and so on.
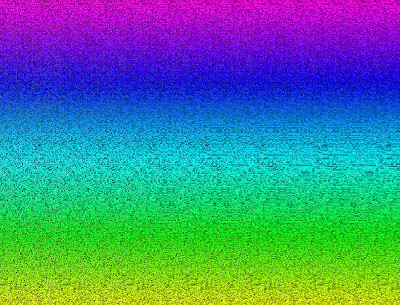
In the end you'll could have something like this. You could then manipulate with the output in Gimp or Photoshop.


NB! Stereogram Maker could create stereoimages from dxf files directly

Friday, March 12, 2010

Blender and Post Processing

Well, this is tutorial on some way you could use Blender. Let's assume we have some image (not necessary render)where we we want to add some glow effect and we don't have Photoshop, Gimp or any other program for raster image manipulation... We have only Blender 2.5 alpha 2 (well if we have Blender 2.49 it also could be used). Ok Let's start.


Above you see our basic image (I'v made it in Blender specially for the tutorial, but almost any other image could be used to).
Open Blender.

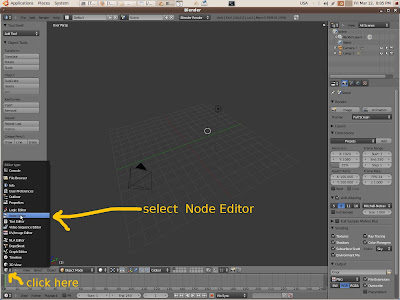
Then switch to the Node Editor window (look at the image above).
You'll see Blender node editor one of very powerful tools Blender could use. What are nodes ?
You could find some basic info here
http://www.blender.org/development/release-logs/blender-242/blender-composite-nodes/
Look at image below and make everything what is said there.


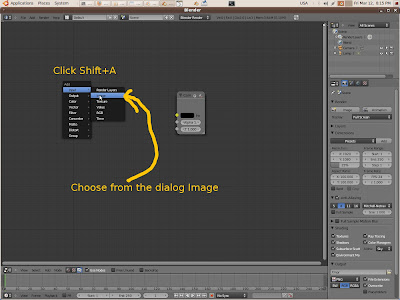
Now we need to input our image to Blender. Click Shift+A and choose Image node from the dialog. See image below


After that choose your Image from Open dialog and adjust dimension.

Here interesting part starts. With Shift+D duplicate image node. Then click Shift+A and select mix node (color->mix) . Click Shift+A again and add Blur node (filter->Blur). Click Shift+A yet one more time and add HSV node (color->Hue Saturation Value ). Some Nodes will join automatically. It's not important as we will join them in right way later.


Let's see how final setup looks like.

What happens here ? We have to images which we compose like usual layer in such programs like Gimp or Photoshop. To first layer we add Blur. Then we adjust colors with HSV. Everything is clear I think.
Before render result you have to be sure that in Render tab in Post Processing Composition is Switched On. I'm not sure that it is, by default. After that you could push F12 button and then look at result. If you like it then you could save it, if no then change something in node setup.
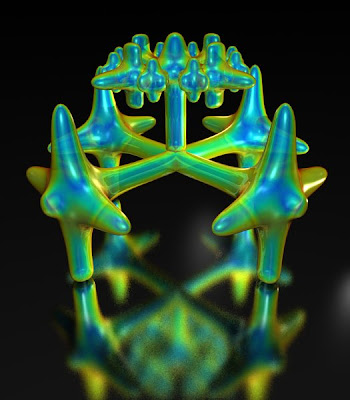
Let's look at my final result.

NB!Blender 2.5 alpha had crashed many times while I was making this tutorial (don't forget it's alpha). So if you try to use it push Shift+W sometimes ).
Uf, Well it is my first tutorial and I'm rather tired.
By the way, how is my english ?
I hope this tutorial will be useful.

Monday, March 8, 2010

Football

Without good modell you'll never have good render.
So this post is about modeling. Here is my model of soccer ball with simple render. Both the model and render are made in Blender 2.49b


To create it I've used icosphere with 2 subdivisions. After that I've used multiresolution. Then painted pentagons in black color (I've set new material for them). Maybe it was a mistake.Perhaps it was better to set new material in the end.
After that you need to use subsurface and extrude all pentagons and geksagons one by one on the same length (I've extruded them on 0.01 unit). It's rather boring part of work. That last idea I've found in tutorial here
http://limn.0fees.net/2008/06/12/blender-3d-soccer-ball-football-tutorial/#more-6
Thanks for the tutorial to the author)

Sunday, March 7, 2010

Some experiments with new possibilities of Blender 2.5.alpha 2. It's alpha so it is has many bugs and of course not all new features are integrated. Maybe it would be interesting.
I'v used simple scene with one point light in it.


This is usual render.


This is usual render without ray tracing. It's of course the fastest form of render, so not very useful.


OK. Ambient occlusion. Multiply. Raytrace. Absolutely nothing interesting about it, except noise have appeared.


Ambient occlusion. Multiply. Approximate.
Rather predictable result -- noise has gone. But still nothing interesting.


Ambient occlusion,add,approximate. Much more interesting.
Those awful shadows have gone, lightning is very cute.
For AO with raytrace the result is very close except noise for small
amount of samples appeared.


environment lightning , approximate, color:white,


and this is stable Blender 2.49b. Rather gloomily Don't you think?
If you switch off color management in Blender2.5 alpha you'll have the same result.


This is also Blender 2.49b
Ambient Occlusion, samples:5, Raytrace, Add, Sky Color

intro

this is blog about 3d , render, maybe about photography... about different things