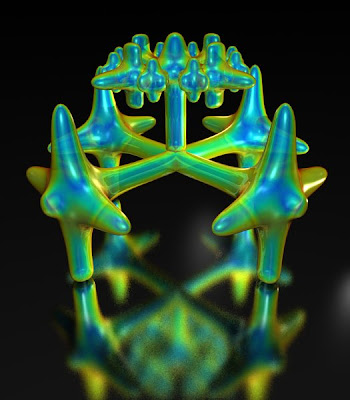
Above you see our basic image (I'v made it in Blender specially for the tutorial, but almost any other image could be used to).
Open Blender.
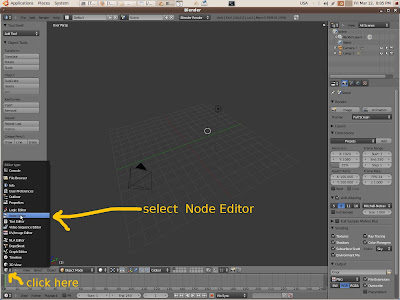
Open Blender.

Then switch to the Node Editor window (look at the image above).
You'll see Blender node editor one of very powerful tools Blender could use. What are nodes ?
You could find some basic info here
http://www.blender.org/development/release-logs/blender-242/blender-composite-nodes/
Look at image below and make everything what is said there.
Now we need to input our image to Blender. Click Shift+A and choose Image node from the dialog. See image below
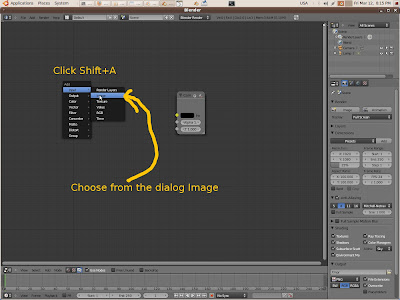
After that choose your Image from Open dialog and adjust dimension.
Here interesting part starts. With Shift+D duplicate image node. Then click Shift+A and select mix node (color->mix) . Click Shift+A again and add Blur node (filter->Blur). Click Shift+A yet one more time and add HSV node (color->Hue Saturation Value ). Some Nodes will join automatically. It's not important as we will join them in right way later.
You'll see Blender node editor one of very powerful tools Blender could use. What are nodes ?
You could find some basic info here
http://www.blender.org/development/release-logs/blender-242/blender-composite-nodes/
Look at image below and make everything what is said there.
Now we need to input our image to Blender. Click Shift+A and choose Image node from the dialog. See image below

After that choose your Image from Open dialog and adjust dimension.
Here interesting part starts. With Shift+D duplicate image node. Then click Shift+A and select mix node (color->mix) . Click Shift+A again and add Blur node (filter->Blur). Click Shift+A yet one more time and add HSV node (color->Hue Saturation Value ). Some Nodes will join automatically. It's not important as we will join them in right way later.
What happens here ? We have to images which we compose like usual layer in such programs like Gimp or Photoshop. To first layer we add Blur. Then we adjust colors with HSV. Everything is clear I think.
Before render result you have to be sure that in Render tab in Post Processing Composition is Switched On. I'm not sure that it is, by default. After that you could push F12 button and then look at result. If you like it then you could save it, if no then change something in node setup.
Let's look at my final result.
NB!Blender 2.5 alpha had crashed many times while I was making this tutorial (don't forget it's alpha). So if you try to use it push Shift+W sometimes ).
Uf, Well it is my first tutorial and I'm rather tired.
By the way, how is my english ?
I hope this tutorial will be useful.


